- how to create a simple page that’s responsible for displaying details for a particular pin
- how to execute GraphQL queries using already configured Apollo Client

- how to read parameters sent via URL and use them in React components
In order to follow this tutorial, you must use Webiny version 5.18.0 or greater.
The code that we cover in this section can also be found in our GitHub examples repository . Also, if you’d like to see the complete and final code of the application we’re building, check out the full-example folder.
Overview
The final piece of the puzzle is the Pin Details page.
So, once a user clicks on a pin on the Homepage, we want to redirect her/him to a dedicated pin page, that will show a bit more information about it:
- author
- cover image
- title
- description
For now, since we didn’t cover security and file upload functionality yet, we’ll leave the author information and cover image blank. We’ll revisit this page and add the missing pieces soon, in the upcoming sections of this tutorial.
Creating the Pin Details Page
Unlike with the Homepage, where we already had some code in the already existing home.tsx file, for the Pin Details page, we’ll need to create a new pinDetails.tsx file. The file will contain the PinDetails React component which we’ll export via a new RoutePlugin plugin:
import React from "react";
import { RoutePlugin } from "@webiny/app/plugins/RoutePlugin";
import { Link, Route, RouteChildrenProps } from "@webiny/react-router";
import { Empty, Image, Row, Col, Divider } from "antd";
import { useQuery } from "@apollo/react-hooks";
import gql from "graphql-tag";
import Layout from "~/components/Layout";
import blankImage from "~/images/blankImage.png";
// Retrieves a previously created pin by given ID.
const GET_PIN = gql`
query GetPin($id: ID!) {
pins {
getPin(id: $id) {
id
title
description
coverImage
}
}
}
`;
// Only a single `id` parameter is present in the route.
type Props = RouteChildrenProps<{ id: string }>;
// The Pin Details page.
const PinDetails: React.FC<Props> = props => {
const getPinQuery = useQuery(GET_PIN, { variables: { id: props.match.params.id } });
const data = getPinQuery?.data?.pins?.getPin;
return (
<Layout className={"pin-details"}>
{data ? (
<Row gutter={24}>
<Col span={12} className={"centered"}>
{/* If we have an image, let's use the `Image` component
so that users have the option to show it full screen. */}
{data.coverImage ? (
<Image src={data.coverImage} />
) : (
<img title={data.title} alt={data.title} src={blankImage} />
)}
</Col>
<Col span={12}>
<h1>{data.title}</h1>
<p>{data.description}</p>
</Col>
</Row>
) : (
/* Data not loaded? Let's show a friendly `Nothing to show.` message */
<Empty description={"Nothing to show."} />
)}
<Divider />
<Link to={"/"}> ← Back</Link>
</Layout>
);
};
// We register routes via the `RoutePlugin` plugin.
export default new RoutePlugin({
route: <Route path="/pins/:id" exact component={PinDetails} />
});As we can see, we’re still using the Ant Design React library to build the majority of the Pin Details page. And we’re again using the Apollo Client and its useQuery React hook to retrieve the pin data. But, notice how, in order to retrieve it, we need an ID of the pin, which is actually passed via the page URL, for example:
/pins/612fb852d1fb0300099b5d28
In order to form this URL structure and be able to read the ID from it, we’ve passed /pins/:id as the path prop to our Route component:
// We register routes via the `RoutePlugin` plugin.export default new RoutePlugin({ route: <Route path="/pins/:id" exact component={PinDetails} />});Once we have that, the ID of the pin can be easily retrieved within our PinDetails React component, via props.match.params.id, for example:
const getPinQuery = useQuery(GET_PIN, { variables: { id: props.match.params.id } });Finally, in order to preserve type safety, notice how we’ve defined the PinDetails React component’s props with the help of RouteChildrenProps type:
type Props = RouteChildrenProps<{ id: string }>;This is what lets us define the type of props.match.params and, ultimately, freely access props.match.params.id.
In case you missed it, the @webiny/react-router library is a thin wrapper around the popular React Router and its react-router-dom library, which just adds a couple of minor features to it. For example, via the ReactRouterOnLinkPlugin plugin, it gives developers the ability to execute a piece of code for every link that’s rendered on the page.
Registering the RoutePlugin Plugin
One last step we need to take here is register the exported RoutePlugin plugin in the pinterest-clone/app/code/src/plugins/index.ts . We can do that like so:
import { plugins } from "@webiny/plugins";import apolloLinkPlugins from "./apollo";import home from "./routes/home";import pinDetails from "./routes/pinDetails";import notFound from "./routes/notFound";
// Imports and registers all defined plugins.plugins.register([  // Various Apollo client plugins.  apolloLinkPlugins,
  // Application routes.  home,  pinDetails,  notFound]);
Without doing this step, visiting the Pin Details page still wouldn’t work. The user would simply receive a Not Found page instead.
Additional Page Styles
If you tried to check the results of the changes we’ve done so far, in terms of the functionality, everything should work as expected. The only thing we could do here is add a bit of styling, just so the page looks a bit nicer and more polished.
So let’s create a new pinDetails.scss file in pinterest-clone/app/code/src/styles and paste the following code into it:
// Pin details page styles.
.pin-details {
  padding: 25px 125px;
  .user {
    display: flex;
    align-items: center;
    > * {
      margin-right: 5px;
    }
  }
  img {
    border-radius: 20px;
  }
}
Then, similarly to what we did in the previous Registering the RoutePlugin Plugin section, let’s import this newly created file in the App.scss file, like so:
// An entrypoint file that imports all styles your application might have.@import "./styles/global";@import "./styles/home";@import "./styles/pinDetails";@import "./styles/notFound";Final Result
Finally, with all of the both React and Sass code in place, if we were to click on an arbitrary pin from the homepage, we should be redirected to the Pin Details page and see something like the following:
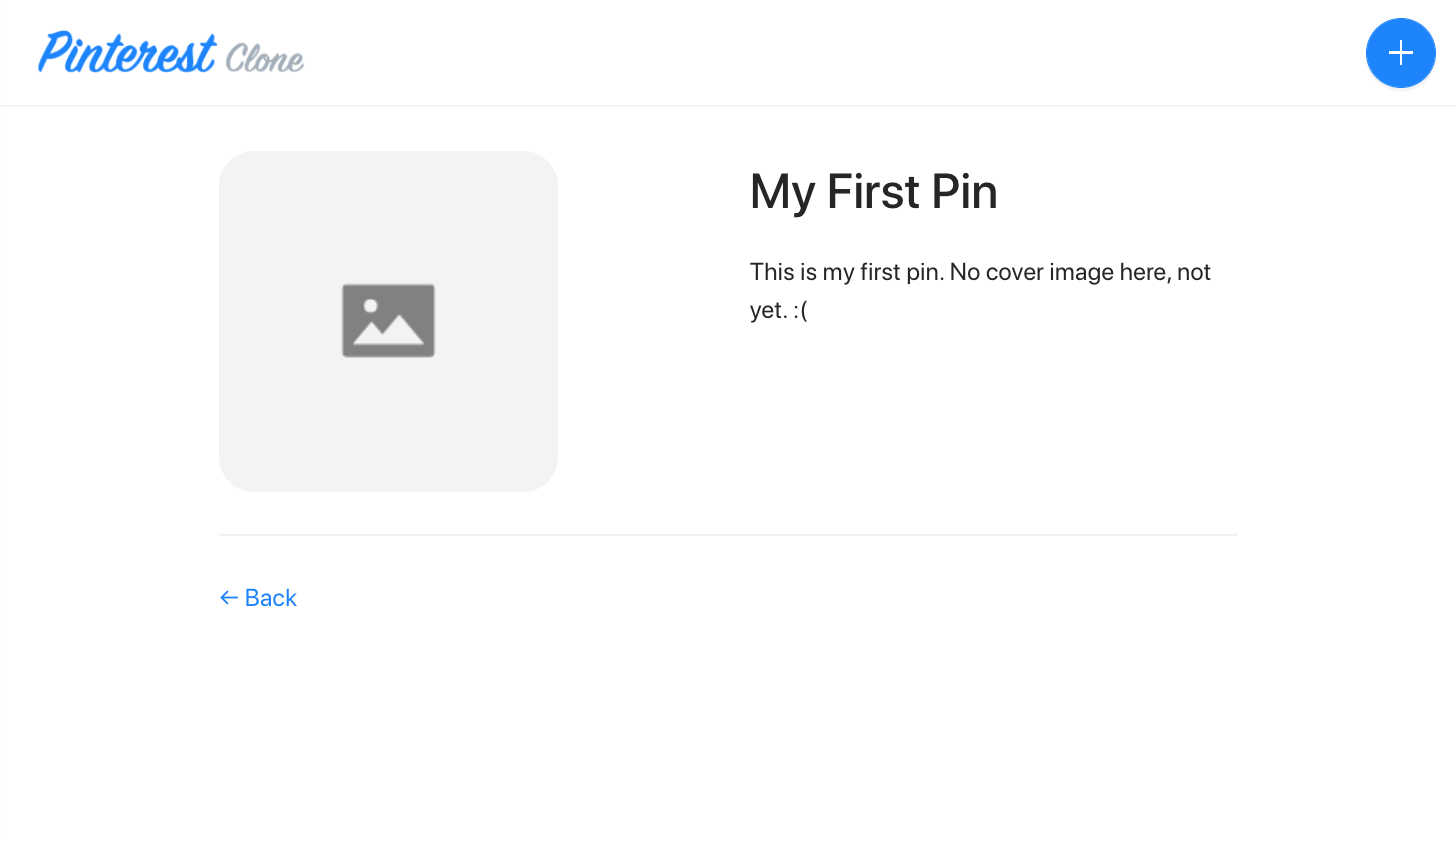
If that’s the case, then all of the steps were performed correctly. This also means we can move on to the following section of this tutorial, in which we’ll talk about securing your application.