- how we can add and deploy a new User Pool Client, via React application’s cloud infrastructure code
In order to follow this tutorial, you must use Webiny version 5.18.0 or greater.
The code that we cover in this section can also be found in our GitHub examples repository  . Also, if you’d like to see the complete and final code of the application we’re building, check out the
 full-example folder.
Adding User Pool Client
With the Amazon Cognito User Pool and User Pool Domain deployed, we’re ready to define the last missing cloud infrastructure resource, and that’s the User Pool Client. This is what will enable us to access the Hosted UI authentication flow from our React application and interact with Amazon Cognito’s HTTP API (more on this soon).
In the pinterest-clone/app/pulumi folder, let’s create a new cognito.ts file, and place the following code into it:
import * as aws from "@pulumi/aws";import { getStackOutput } from "@webiny/cli-plugin-deploy-pulumi/utils";import Cloudfront from "./cloudfront";
class Cognito {userPoolClient: aws.cognito.UserPoolClient;constructor({ cloudfront }: { cloudfront: Cloudfront }) {  const { cognitoUserPool } = getStackOutput({    folder: "pinterest-clone/api",    env: String(process.env.WEBINY_ENV),  });
  // Allowed callback and logout URLs. We need localhost for development purposes,  // and the Cloudfront distribution for the deployed application.  const local = `http://localhost:3002`;  const callbackUrls = [`${local}?signIn`, cloudfront.getDistributionUrl("?signIn")];  const logoutUrls = [`${local}?signOut`, cloudfront.getDistributionUrl("?signOut")];
  // Creates a new user pool client, which we'll use in our React application.  // https://www.pulumi.com/docs/reference/pkg/aws/cognito/userpoolclient/  // https://docs.aws.amazon.com/cognito-user-identity-pools/latest/APIReference/API_CreateUserPoolClient.html  this.userPoolClient = new aws.cognito.UserPoolClient("pinterest-clone", {    userPoolId: cognitoUserPool.id,    callbackUrls,    logoutUrls,
    // A list of provider names for the identity providers that are supported on    // this client. Supported values: COGNITO, Facebook, Google and LoginWithAmazon.    supportedIdentityProviders: ["COGNITO"],
    // Enables usage of OAuth flows.    allowedOauthFlowsUserPoolClient: true,    allowedOauthFlows: ["implicit"],    allowedOauthScopes: ["openid", "profile", "email"],  });}}
export default Cognito;
Like in the previous section, we’re again exporting a single Cognito class, although this time, only a single User Pool Client is encapsulated within it.
Some of the more important properties here would be the userPoolId, which determines the parent User Pool, and the callbackUrls and logoutUrls properties, which contain a list of allowed redirect URLs. Remember, once users complete the external Hosted UI authentication flow, they are redirected back to our application. That’s why we’ve added both localhost URL (for local development purposes) and an existing Cloudfront distribution URL (used once our React application is deployed and used online). We’ll see how we’ll distinguish between the two in our React application, soon enough.
Like in the previous section, the next step is to visit the index.ts entry point file, located in the pinterest-clone/app/pulumi folder. There, we’ll import the newly created file, instantiate the Cognito class so that the encapsulated cloud infrastructure code actually gets executed, and, finally, update the stack output properties. Here we’ll add the cognitoUserPool.clientId property, which, as the name suggests, will contain the ID of the deployed User Pool Client.
import { tagResources } from "@webiny/cli-plugin-deploy-pulumi/utils";
/** * In order to host the React application, we deploy two cloud infrastructure resources: * - an S3 bucket into which the production build files are uploaded * - a CDN which enables us to cache production build files (CSS, JS, images) * * If needed, feel free to add new resources or modify the existing ones. */
import App from "./app";import Cloudfront from "./cloudfront";import Cognito from "./cognito";
export = async () => {  // Add tags to all resources that support tagging.  tagResources({      WbyProjectName: process.env.WEBINY_PROJECT_NAME as string,      WbyEnvironment: process.env.WEBINY_ENV as string  });
  const app = new App();  const cloudfront = new Cloudfront({ appS3Bucket: app.bucket });  const cognito = new Cognito({ cloudfront });
  return {      appUrl: cloudfront.getDistributionUrl(),      cognitoUserPool: {          clientId: cognito.userPoolClient.id      }  };};
Now that we have all of this code in place, we can continue with the next step, and that’s deployment.
Deployment
In one of our previous sections, we stated the following:
Frontend application development, or, in our case, React application development, can still be performed locally, on the developer’s machine. You only deploy it when you need to have it online.
And although, as far as the actual React application development is concerned, this is true, there are still cases in which our application needs to talk with a particular cloud infrastructure resource, in order to function properly.
For example, the Hosted UI authentication flow, which we’re trying to implement here, can only be accessed with a valid User Pool Client. This means that, in order to use it in our React application and actually test the authentication flow, we need to deploy it.
So, in order to do that, we can run the following command:
yarn webiny deploy pinterest-clone/app --env dev --no-buildNotice the --no-build argument at the end of the command. With it, we’ve instructed the webiny deploy command to not worry about our React application (its code), but just ensure that the supporting cloud infrastructure resources are deployed. Furthermore, note that this will not only deploy the newly defined User Pool Client, but also other already defined resources - an Amazon S3 bucket and a CloudFront distribution .
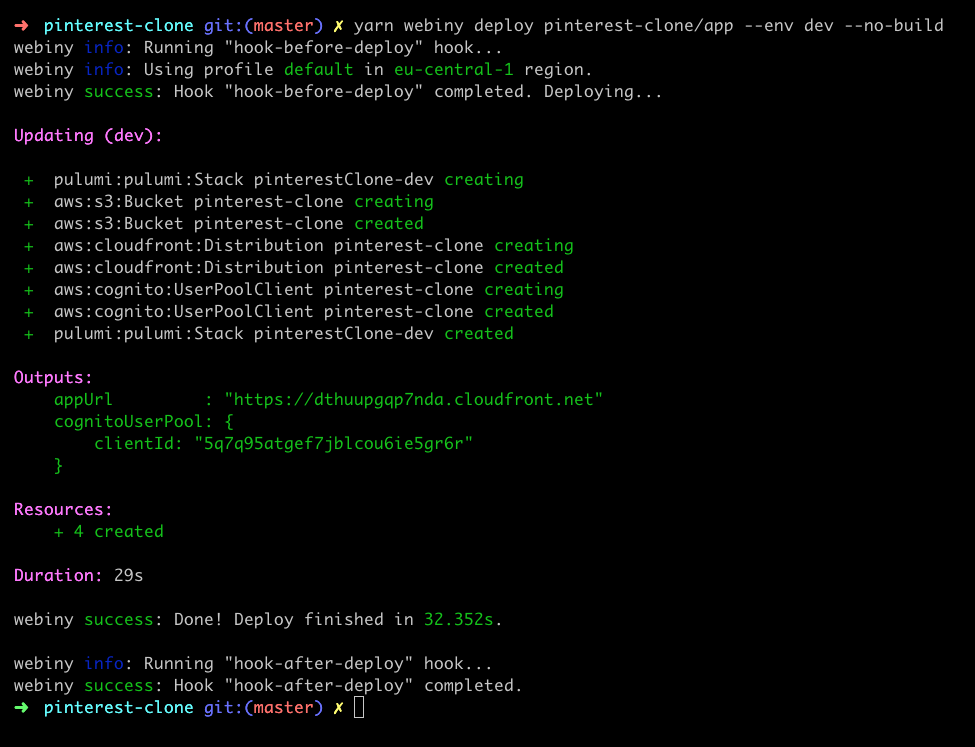
As seen in the screenshot above, except all of the cloud infrastructure resources-related changes, in the Outputs section, we can also see the updated stack output.
Final Result
In this section, we defined and deployed the last cloud infrastructure resource that we need in order to implement the Hosted UI authentication flow: the User Pool Client. Also, by adding cognitoUserPool.clientId to stack output properties, we’ve exposed the ID of the deployed User Pool Client. This will enable us to later retrieve it within our React application code and connect everything together.
With all of this in place, there’s one additional step we need to complete before we finally start working on our React application code, and that’s adjusting its webiny.config.ts configuration file.